I made my 70 year old parents crispy pork belly


Описание
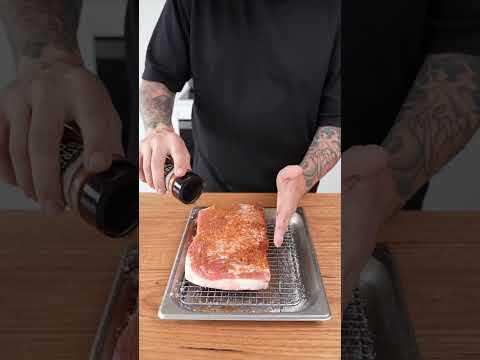
CRISPY PORK BELLY⤵️
2.5-3 lb pork belly
MARINADE (BROWN)
1 TBSP ketchup
2 tsp sugar
1 tsp salt
1 tsp five spice
1/2 tsp black pepper
- mix this together
VINEGAR MIXTURE (WHITE)
1/2 tsp salt
1 tsp vinegar
- mix this together
1. Poke a bunch of holes onto the skin side of pork belly
2. On the meat side of your pork belly, cut slits into it. About 1.5 - 2 inches apart from each other and 1-2 cm deep
3. On the meat side of your pork, coat it with your MARINADE. Make sure you get in between the slits and on the sides
4. On the skin side, wipe off any marinade and any other liquids. Then coat it with your VINEGAR MIXTURE.
5. Then lay your pork belly on a piece of foil (skin side up) and form a boat around your pork belly with the foil. (watch video for clarification).
-Then refrigerate your pork belly un covered for at least 3 hours
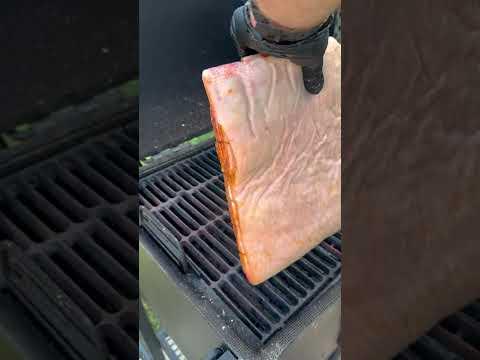
6. After 3+ hours, place pork belly onto an oven safe dish lined with foil — skin side down. Bake at 400F for 20 mins on the middle rack.
7. After 20 mins of baking, remove pork belly from oven and flip it over. The skin side should now be up.
- Poke a bunch of holes into the skin and pat the skin dry.
- Apply another layer of your VINEGAR MIXTURE all over the skin. You do not need to poke holes at this point.
- Bake at 400F for another 20 minutes (total 40 mins bake time)
8. Repeat step 7 one more time. You’ll start to see bubbles on the skin at this point
9. After a total of 60 minutes baking, switch to broil and broil for 5 minutes. Keep an eye on your pork belly so it doesn’t burn. The skin will crackle/ bubble up some more.
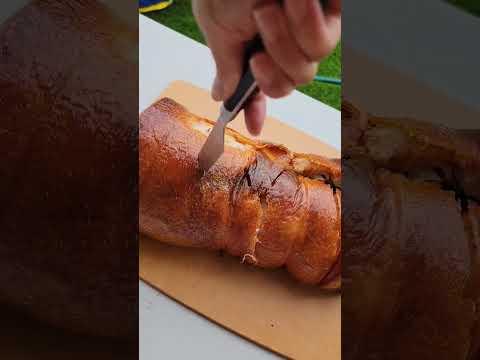
10. Allow to cool skin side up (if you cool skin side down, the skin will become soggy and no longer crispy. Learn from my mistake)
11. Once cool, cut to desired side. I cut following the incisions I made.
12. Enjoy =)